Centralized Workflow
AKA Everyone Works On Master/Main
AKA The Most Basic Workflow Possible
The simplest collaborative workflow is to have everyone work on the master branch (or main, or any other SINGLE branch).
It's straightforward and can work for tiny teams, but it has quite a few shortcomings!
Pamela, Forrest and David clone the repo
Forrest gets to work on a new feature and pushes his work to Github
At the same time, Pamela also worked on a new feature. She tries to push her new work up to Github, but she runs into trouble as the current branch is behind its remote counterpart. So she pulls to get the changes from origin master, merges them and then pushes them
David is working on a new feature, but is having some doubts. He'd like to share his commits with the rest of the team to start a discussion but before he can commit he has to pull from Github and merge them into master Now he can finally push his work up to Github. His teammates can pull to get his new commits.
The Problem
While it's nice and easy to only work on the master branch, this leads to some serious issues on teams :
Lots of time is spent resolving conflicts and merging code, especially as team size scales up.
No one can work on anything without disturbing the main codebase. How do you try adding something radically different in? How do you experiment?
The only way to collaborate on a feature together with another teammate is to push incomplete code to master. Other teammates now have broken code...
Feature Branches
Rather than working directly on master/main, all new development should be done on separate branches!
Treat master/main branch as the official project history
Multiple teammates can collaborate on a single feature and share code back and forth without polluting the master/main branch
Master/main branch won't contain broken code (or at least, it won't unless someone messes up)
Pamela, Forrest and David clone the repo
David starts work on a new feature. He does all this work on a separate branch!
David wants Pamela to take a look at his new feature. Instead of merging it into master, he just pushes his feature branch up to Github!
Pamela is hard at work on her own new feature. Just like everyone else, she's working on a separate feature branch rather than master.
Pamela hears from David that he wants her to take a look at his new work. She pulls down his feature branch from Github.
Pamela takes a look at the code and makes a couple of improvements of her own. She adds/commits on the same feature branch.
Pamela pushes up her new work on the add-dark-theme feature branch so that David can pull them down.
David fetches from Github and sees that there is new work on the add dark theme branch. He pulls the changes down and continues work.
David decides he is happy with the new feature, so he merges it into master!
David pushes up the updated master branch to Github. The others can now pull down the changes.
Feature Branch Naming
There are many different approaches for naming feature branches. Often you'll see branch names that include slashes like bug/fix-scroll or feature/login-form or feat/button/enable-pointer-events
Specific teams and projects usually have their own branch naming conventions.
Merging In Feature Branches
At some point, the new work on feature branches will need to be merged into the master branch! There are a couple of options for how to do this :
Merge at will, without any sort of discussion with teammates. JUST DO IT WHENEVER YOU WANT.
Send an email or chat message or something to your team to discuss if the changes should be merged in.
Pull Requests!
Pull Requests
Pull Requests are a feature built into products like GitHub and Bitbucket. They are not native to Git itself.
They allow developers to alert team members to new work that needs to be reviewed. They provide a mechanism to approve or reject the work on a given branch. They also help facilitate discussion and feedback on the specified commits.
"I have this new stuff I want to merge into the master branch...what do you all think about it?"
The Workflow
Do some work locally on a feature branch
Push up the feature branch to Github
Open a pull request using the feature branch just pushed up to Github
Wait for the PR to be approved and merged. Start a discussion on the PR. This part depends on the team structure.
Merging Pull Requests with Conflicts
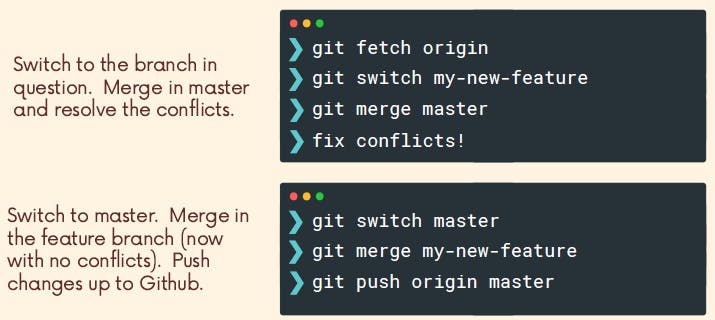
Just like any other merge, sometimes some conflicts need to be resolved when merging a pull request.
You can perform the merge and fix the conflicts on the command line like normal, or you can use Github's interactive editor.

Fork and Clone
The "fork and clone" workflow is different from anything we've seen so far. Instead of just one centralized Github repository, every developer has their own Github repository in addition to the "main" repo.
Developers make changes and push to their own forks before making pull requests.
It's very commonly used on large open-source projects where there may be thousands of contributors with only a couple of maintainers.
It allows a project maintainer to accept contributions from developers all around the world without having to add them as actual owners of the main project repository or worry about giving them permissions to push to the repo
Forking
Github (and similar tools) allow us to create personal copies of other people's repositories. We call those copies a "fork" of the original.
When we fork a repo, we're basically asking Github "Make me my own copy of this repo please"
As with pull requests, forking is not a Git feature. The ability to fork is implemented by Github.
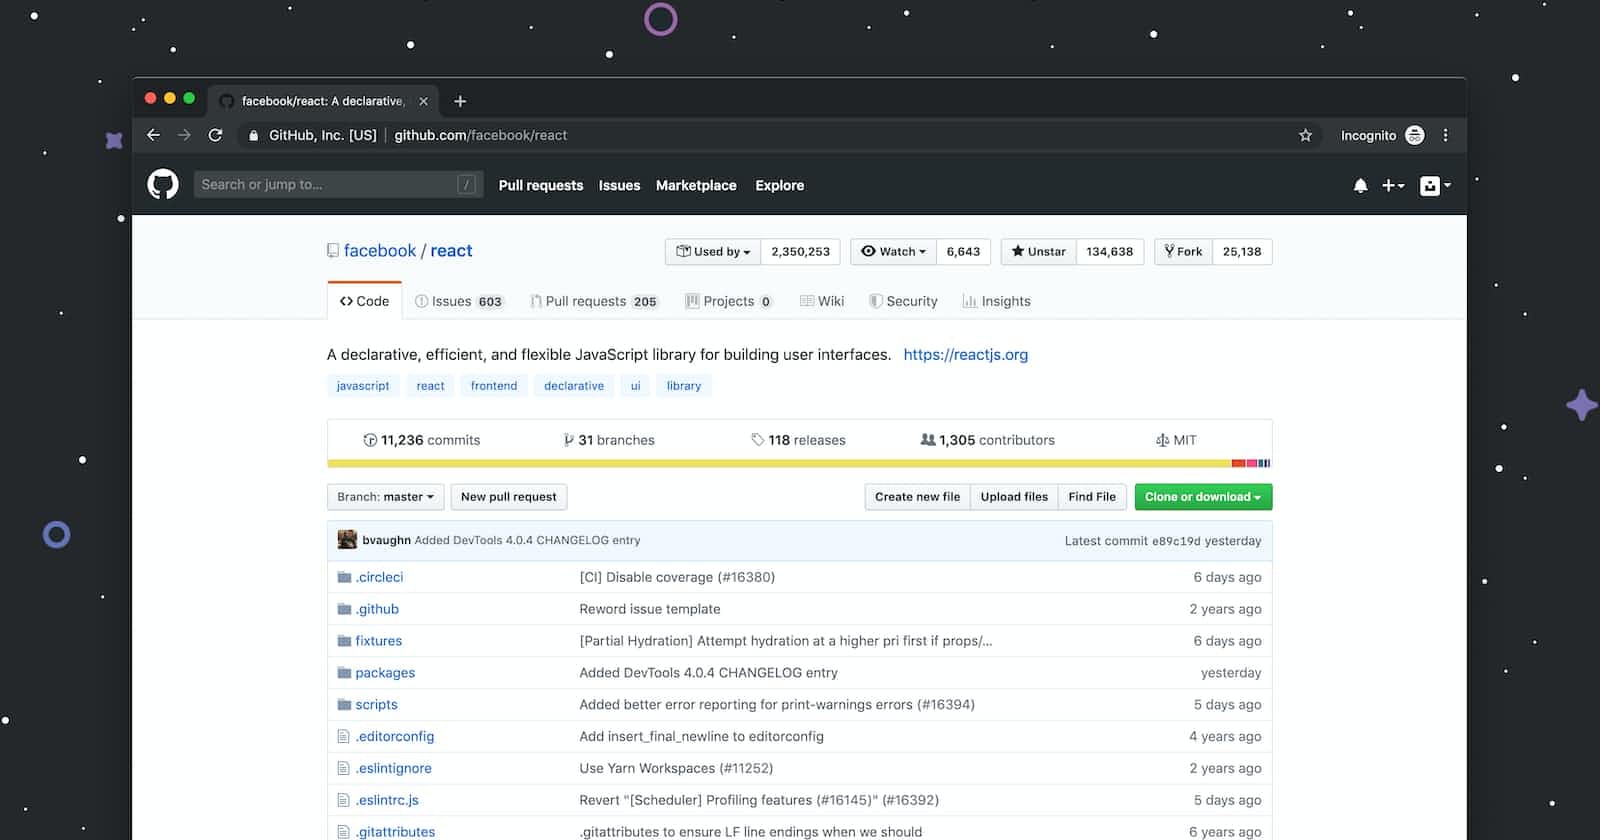
When you click on the fork button on that repository, it will create a copy on your account
Now that I've forked, I have my very own copy of the repo where I can do whatever I want!
I can clone my fork and make changes, add features, and break things without fear of disturbing the original repository.
If I do want to share my work, I can make a pull request from my fork to the original repo.
Workflow
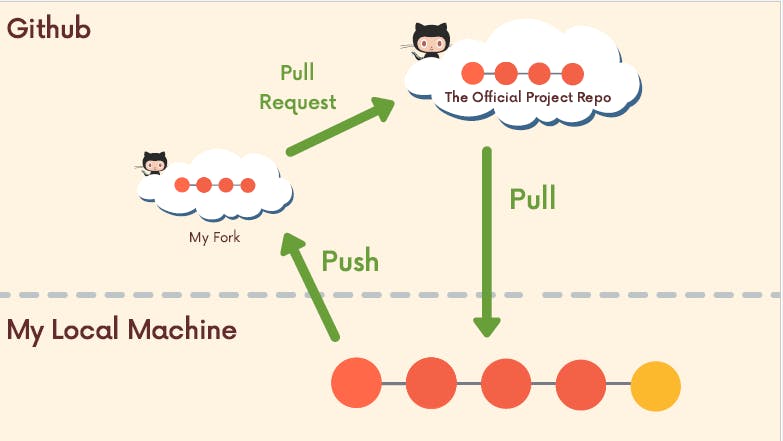
When we clone a repo, Git automatically adds a remote called origin that points to our forked repo on GitHub.
Next, I add a remote pointing to the original project repo (NOT the fork). This remote can be named anything, but you'll often see "upstream" or "original" used.
git remote add upstream <url>I do some new work locally. To share my changes with others, I cannot push to upstream. I don't have permission! But I can push to origin (my Github fork)
Next, I can make a pull request from my fork on Github to the original project repository. Now I wait to hear from the project maintainers! Do they want me to make further changes? It turns out they accept and merge my pull request!
The next day, I get back to work. The official project repo now contains work done by other collaborators. I don't have their new work on my machine! I'm behind!
All I need to do is pull from upstream (the original repo) to get the latest changes in my local repo.
Now I have the latest changes from the upstream repo! I can work on some new features locally without working about being out of date.

Summary
I fork the original project repo on GitHub
I clone my fork to my local machine
I add a remote pointing to the original project repo. This remote is often named upstream.
I make changes and add/commit on a feature branch on my local machine
I push up my new feature branch to my forked repo(usually called origin)
I open a pull request to the original project repo containing the new work on my forked repo
Hopefully, the pull request is accepted and my changes are merged in!

